


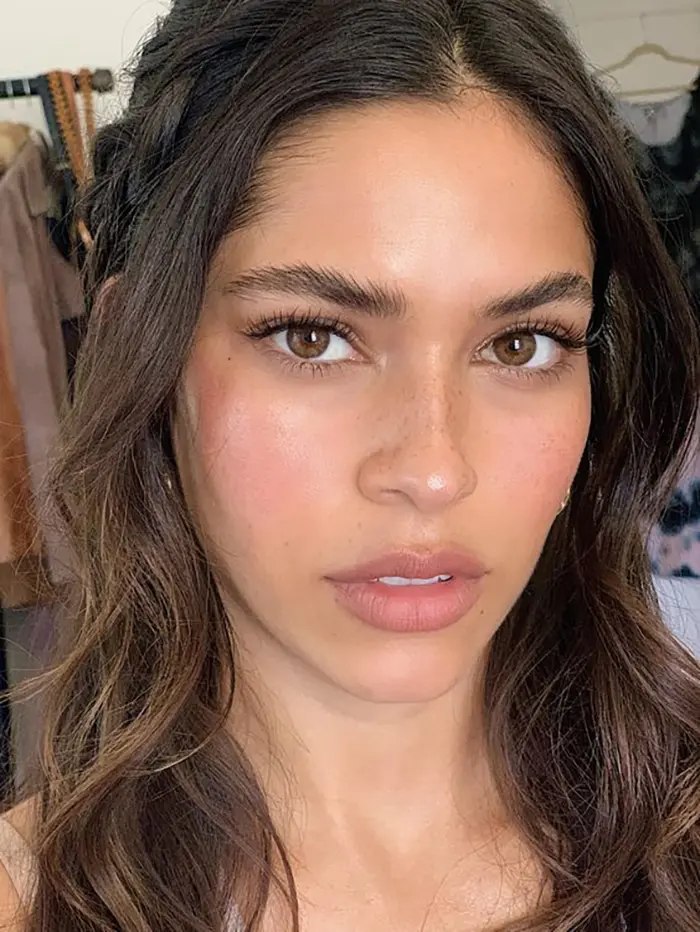
Eyebrows really are the frame of your face, aren’t they? Whether you love the look of bold, thick brows or prefer a softer, more natural vibe, the right eyebrows can totally transform your appearance. But let’s be real: achieving perfect eyebrows takes a bit more than a quick tweeze or a haphazard pencil stroke. If you want your brows to truly shine and enhance your features, stick with me! I’ve got a simple three-step method that’ll help you master your eyebrow game. Let’s dive in!
Table of contents
Why Are Eyebrows So Important?
Eyebrows have the power to change how your entire face looks. Perfect eyebrows can accentuate your eyes, balance your features, and even give the illusion of a mini facelift. But beyond aesthetics, eyebrows serve functional purposes too — they help keep sweat and debris out of our eyes. But let’s be honest, most of us are obsessed with them because they’re a key feature of any beauty look.
No matter what brow trends come and go, there’s always a way to maintain your natural shape and enhance your look. Here’s how to perfect your eyebrows in three easy steps.
3 Steps to Perfect Eyebrows
Step 1: Shape Your Eyebrows
The first step to perfect eyebrows is all about finding the right shape for your face. It’s not a one-size-fits-all; the ideal shape depends on your face’s features, bone structure, and natural brow shape.
Determine Your Natural Shape
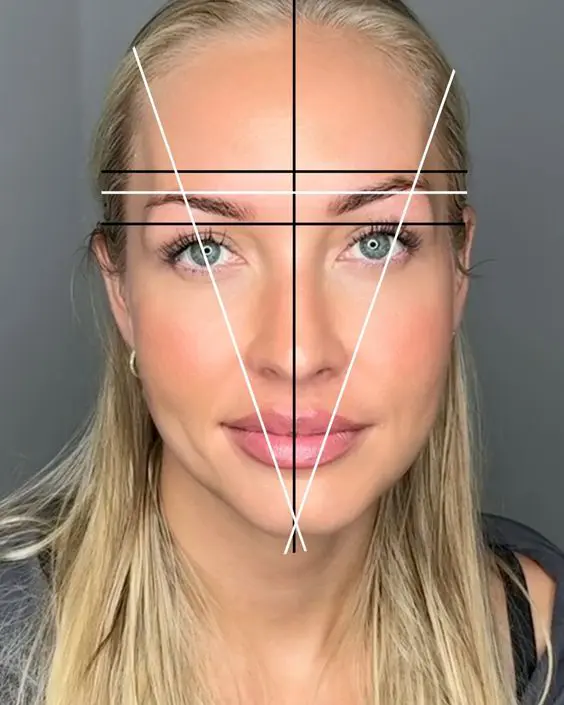
Before you start plucking or shaping, it’s essential to identify your natural and perfect eyebrows shape. This gives you a solid base to work from and ensures that your brows complement your face. Use a brow pencil to outline your ideal shape:
- Arch: To nail that perfect arch, grab a pencil (or anything straight!) and align it from the corner of your nose through the center of your eye. This line will show you where your brow should naturally peak. It’s like a little guideline that helps you find that sweet spot for an eye-opening arch that really enhances your face!
- Start: Now, let’s talk about where your perfect eyebrows should begin. You’ll want them to start right above the outer edge of your nostril. This gives your brows a balanced look and helps frame your face nicely. Just imagine a straight line going up from your nostril—that’s your starting point!
- End: For the perfect finish, your eyebrow should extend to where the corner of your nostril aligns with the outer edge of your eye. This creates a clean, polished look that complements your features. Just follow that imaginary line, and you’ll have brows that look beautifully proportioned and totally on point!

Tools for Shaping:
- Tweezers: The most common tool for shaping brows. Use tweezers to remove stray hairs and define the shape.
- Waxing or Threading: For a more professional look, consider these methods for longer-lasting results.
- Trimming: Brow scissors can be used to snip any excessively long hairs that stick out from your brow line.
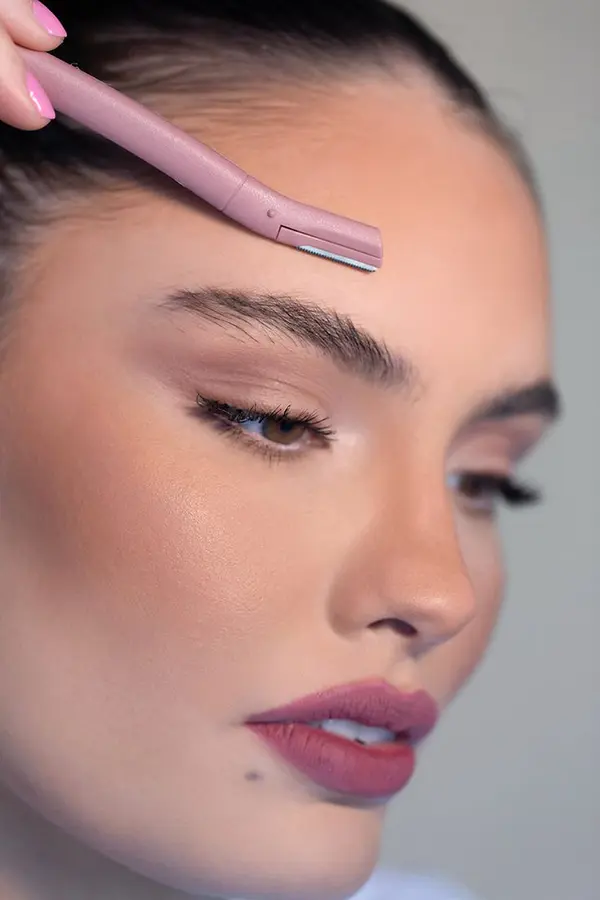
Pluck or Wax Sparingly
Once you’ve determined the shape you want to enhance for perfect eyebrows, use tweezers or wax to remove stray hairs — but be careful not to overdo it! Thinning your eyebrows too much can make them look sparse and unnatural, and it can take months for them to grow back.
To keep your brows full and natural:
- Only remove hairs that are clearly outside your brow line.
- Always pluck in the direction of the hair growth to avoid irritation.
- Use a brow razor for any fine hairs outside the immediate brow area.
If you’re nervous about shaping your brows yourself, it might be worth seeing a professional brow artist or esthetician. They can map your brows, remove excess hair, and give you a perfect shape that’s easy to maintain at home.
Pro Tip: Never over-pluck! It’s easier to take off more hair later than to wait for it to grow back. Aim for a natural look that enhances your features and helps you achieve perfect eyebrows effortlessly.

Step 2: Fill and Define Your Eyebrows
Even if you’re blessed with naturally thick and full brows, adding some definition can elevate your entire look. The second step to perfect eyebrows is filling them in with the right products.
Choose the Right Product for Your Brows
There’s no one-size-fits-all when it comes to brow products. Depending on your desired look and your natural brow texture, you can choose from a range of options, including:
- Brow Pencils: These are ideal for creating precise hair-like strokes. Pick a pencil that matches your natural brow color for the most natural effect.
- Brow Powder: Perfect for a softer, more diffused look. Brow powder can also help set any pencil strokes you’ve applied.
- Pomades and Gels: If you prefer a bolder look, a brow pomade or gel can help you achieve more intensity and hold. Gels also help keep stray hairs in place.
If you’re new to brow products, a pencil or powder is usually the easiest place to start.
How to Fill Your Brows?
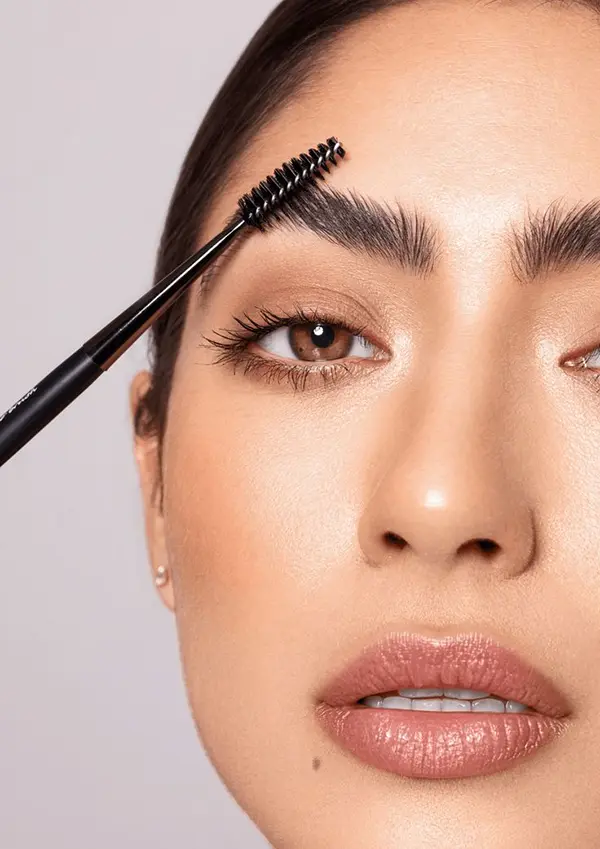
Begin by brushing your brows upward with a spoolie brush to reveal the natural shape of your perfect eyebrows. This allows you to see any sparse spots that need filling. Using light, hair-like strokes, fill in your eyebrows, focusing on areas where your natural hairs are thinner.
- Begin filling in your brows using soft, light strokes, focusing on areas that are sparse. Avoid heavy-handedness to keep the look natural.
- Start at the inner part of your brow and work your way outward, applying more product towards the arch and tail of the brow.
- Use a shade that closely matches your natural brow color for a seamless look. If you’re between shades, opt for the lighter one — it’s easier to build up than to tone down.
- Follow the direction of your natural brow hairs when filling in with your pencil or powder.
- Use a spoolie to blend everything for a natural finish.
Pro Tip: Focus on creating a gradual fade where your brow starts, making sure it isn’t too blocky or dark. The tail end of your brow should be more defined but still natural.

Step 3: Set and Highlight Your Eyebrows
The final step to perfect eyebrows is setting them in place. Setting your brows ensures that all your hard work stays intact throughout the day. No one wants to spend time creating perfect brows only for them to fade or smudge a few hours later!
Lock Your Brows in Place
- Clear Brow Gel: A clear gel can hold your brows in place without adding any extra color or heaviness.
- Tinted Brow Gel: If you prefer more color and texture, a tinted gel can add volume and keep your brows in place.
- Brow Soap: This trend has become popular in recent years for creating fluffy, brushed-up brows. You can use a spoolie and soap for long-lasting hold and texture.
Pro Tip: Apply the brow gel in an upward motion to lift and open up your brows, giving your face a youthful and refreshed look.
Use a lightweight formula that doesn’t feel stiff or crunchy. The goal is to have natural-looking brows that stay put without losing their softness.
Highlight Your Brow Bone
To take your brows to the next level, use a highlighter or light concealer just under your brow bone. This adds definition and gives the illusion of a lifted, more youthful brow.
- Apply a small amount of highlighter just below your arch.
- Blend out with a small brush for a soft, subtle glow.

Common Brow Mistakes to Avoid
When it comes to shaping and filling your eyebrows, there are a few common mistakes that can throw off your look. Avoid these pitfalls for flawless brows:
- Over-plucking: Taking off too much hair, especially from the arch or inner brow, can leave your brows looking thin and uneven.
- Using the wrong shade: A brow pencil or powder that’s too dark or light can look unnatural. Stick to a shade that matches your natural brow color or is one shade lighter.
- Starting too harshly: Filling in the inner brow too heavily creates a blocky appearance. Keep the inner corners light and soft.
- Ignoring your face shape: Not considering your unique face structure can lead to brows that don’t complement your features.
- Skipping blending: Not blending the product with a spoolie brush can leave your brows looking too sharp or overly drawn.
Conclusion
Achieving perfect eyebrows doesn’t have to be overwhelming. With the right technique and a few essential products, you can create the ideal brows to complement your face and style. Remember, it’s all about finding the right shape, filling them in naturally, and setting them in place for all-day perfection.
By following these three simple steps—shape, fill, and set—you’ll master the art of beautiful brows in no time. It’s important to experiment and practice until you find the right routine that works best for you. Your eyebrows are unique to you, and the key to perfect brows is enhancing your natural beauty rather than trying to fit into a one-size-fits-all mold.
So go ahead—grab your brow pencil, spoolie, and gel, and let those brows be your masterpiece!
Frequently Asked Questions
How often should I shape my eyebrows?
The frequency of shaping your eyebrows depends on how quickly your hair grows and how defined you want your brows to be. For most people, a touch-up every 2-4 weeks is ideal to keep stray hairs in check and maintain your desired shape. However, if you have fast-growing hair, you might need to groom your brows more frequently. It’s essential not to over-pluck during touch-ups—just clean up the areas around your natural shape.
What’s the best product for beginners to fill in brows?
If you’re new to filling in your brows and aiming for perfect eyebrows, starting with a brow pencil is your best bet. A pencil provides precise control, allowing you to create hair-like strokes and fill in sparse areas without overdoing it. Look for a pencil that has a spoolie brush on one end to blend out the product, ensuring a more natural look. For beginners, powder can be a bit harder to control, and gels or pomades might come across too bold, so a pencil strikes the perfect balance for achieving flawless, perfect eyebrows.
How can I make my brows look fuller if I have thin hair?
If your brows are naturally thin or you’ve over-plucked in the past, there are a few tricks to make them look fuller. Start by using a brow powder to softly fill in any sparse areas. Then, use a tinted brow gel to brush through the hairs, adding texture and volume. The gel helps create the illusion of thicker brows by coating each hair. Additionally, applying a brow growth serum or castor oil daily can promote hair growth over time, helping you achieve fuller, perfect eyebrows naturally.
Should I pluck, wax, or thread my eyebrows?
Each method has its pros and cons, and it ultimately comes down to your personal preference, skin sensitivity, and pain tolerance. Plucking is precise and gives you control over individual hairs, making it a great option for detailed work. Waxing is faster and works well for removing larger areas of hair, but it can be harsher on sensitive skin. Threading is an ancient method that’s gentle on the skin and provides precise shaping, making it a popular choice for those with sensitive skin or who are prone to breakouts. It’s also quick and doesn’t use any chemicals or heat, which is a bonus for many people.
What can I do if I accidentally over-pluck my eyebrows?
Over-plucking happens to the best of us! If you find yourself in this situation, don’t worry—achieving perfect eyebrows is still possible. In the short term, use a brow pencil or pomade to fill in the sparse areas. Focus on light, hair-like strokes and blend thoroughly with a spoolie for a natural look. To speed up the growth of your brows, apply castor oil or a brow growth serum daily. Patience is key here, as it may take a few weeks or even months for the hairs to grow back fully. In the meantime, embrace the power of makeup to fake the fullness until your brows naturally recover.
Related Posts:


